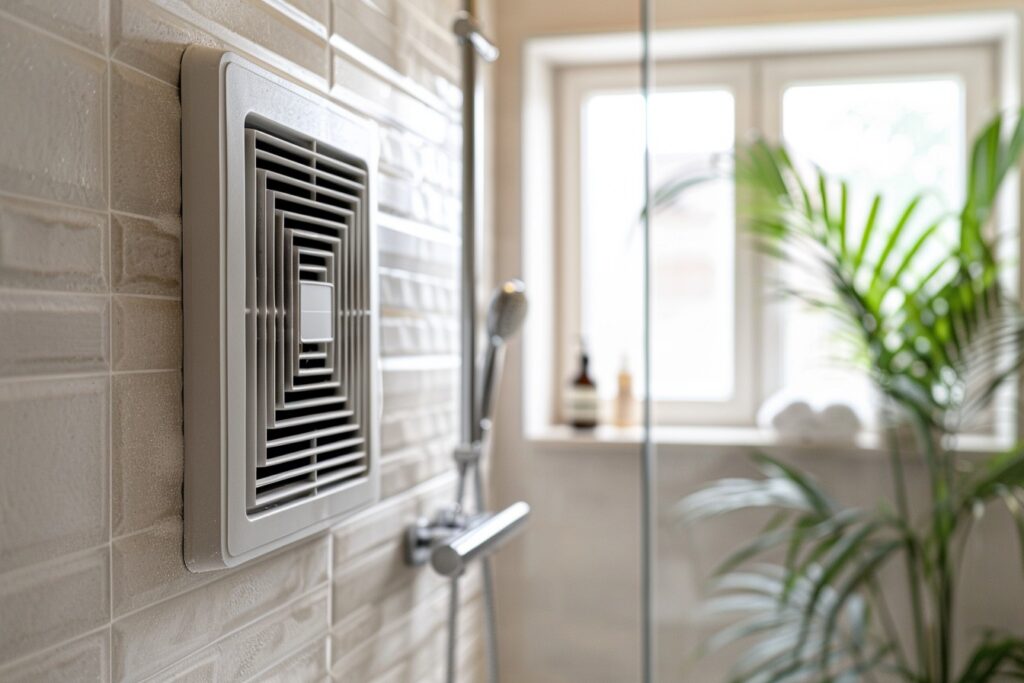
Most people never look directly at their bathroom exhaust fan. It lives up there on the ceiling, humming quietly and doing its job – or at least, that’s the assumption. The reality, for a fan that hasn’t been cleaned in a year or more, is considerably less reassuring. Look up next time you’re in the bathroom and take an honest look at the cover grille. If what you see resembles a gray fur coat more than a ventilation fixture, this article is for you. A neglected exhaust fan isn’t just an aesthetic problem. It’s a fan that isn’t doing its job properly, in the one room of your house where proper ventilation matters most. The good news is that cleaning it is one of those home maintenance tasks that sounds more complicated than it is – and the difference before and after is immediate, visible, and genuinely worth the hour it takes.
What’s Actually Living in Your Exhaust Fan
Dust, Humidity, and a Perfect Storm of Buildup
Bathroom exhaust fan buildup is not the same as the dust you wipe off a bookshelf. What accumulates on and inside a bathroom fan is a compressed mixture of airborne lint, hair particles, skin cells, and aerosolized product residue from hairspray, dry shampoo, and aerosol deodorants – all of it bonded together by the warm, moist air that gets pulled through the unit every time someone showers.
That humidity is the key difference. Moisture acts as a kind of adhesive, causing particles to clump and stick rather than sitting loosely the way dry household dust does. The result is a denser, heavier buildup that doesn’t just look worse than regular dust – it’s genuinely harder to shift, and it accumulates faster than most homeowners expect. A bathroom fan in a household of four can go from clean to noticeably clogged in as little as three months. Pair that with the fact that most people never think to clean it, and you end up with fans that are quietly suffocating behind a solid felt of compacted debris. Gross, certainly – but entirely fixable.
Why a Dirty Exhaust Fan Is More Than an Eyesore
The Real Costs of Ignoring It
A bathroom exhaust fan exists to do one thing: pull humid air out of the room before it settles on surfaces and causes problems. When the fan is clogged, its airflow drops significantly – sometimes to the point where it’s moving almost no air at all despite running continuously. That moisture has to go somewhere, and where it goes is your walls, your ceiling, your grout lines, and your caulk.
Mold follows moisture. In a bathroom that isn’t ventilating properly, mold growth on the ceiling corners, behind the toilet, and along the shower caulk is not a matter of if but when. In Chula Vista, where coastal humidity already gives bathroom moisture a head start, a clogged exhaust fan is a meaningful contributing factor to exactly the kind of mold problems that are expensive and unpleasant to remediate.
There’s also a fire risk that most homeowners aren’t aware of. Dust buildup around an electric motor is a genuine hazard, particularly in older units that run warm. And from a pure efficiency standpoint, a fan struggling to pull air through a clogged grille runs its motor harder and longer to achieve the same result – adding quietly but consistently to your electricity bill without delivering better ventilation.
How Often Should You Actually Clean It
The Honest Answer (It’s More Often Than You Think)
The standard advice of “clean it periodically” is not particularly useful. The honest answer for most households is every three to six months – closer to three if you have multiple people sharing the bathroom, pets in the house, or a shower that gets used twice daily. Every six months is reasonable for a single-occupant bathroom with good supplemental ventilation.
The variables that accelerate buildup are worth knowing: pet dander is a significant one, since it’s lightweight and airborne and gets pulled straight toward the fan. Heavy use of aerosol products is another. Bathrooms without a window, or where the window is never opened, put the full ventilation load on the fan and tend to get dirtier faster as a result.
If you’re not sure whether your fan needs attention right now, there’s a simple visual test that doesn’t require a ladder. Stand in the bathroom and look up at the cover grille from a normal standing distance. If you can see a visible gray coating on the grille slats, or any fuzzy buildup around the edges, it’s time. You shouldn’t need to squint.
What You’ll Need Before You Start
Simple Supplies, Zero Excuses
This is not a complicated supply list. You’ll need a vacuum cleaner with a brush attachment, a screwdriver (though many covers don’t require one), a microfiber cloth or soft-bristle brush, warm water, dish soap, and a dry towel. That’s genuinely it for a standard clean.
Optional but useful: a can of compressed air – the kind sold for cleaning electronics – is excellent for blowing debris out of the motor housing and fan blade without having to reach in with a cloth. If your fan cover has fine grille slats with heavy buildup, an old toothbrush is a better detail tool than a cloth. And if you’re working on a ceiling that requires a step stool, make sure it’s stable on a bathroom floor before you start – tile and step stools have a well-documented disagreement with each other.
Step-by-Step: How to Clean a Bathroom Exhaust Fan Properly
The Cover
The cover is the part most homeowners skip, because removing it feels like it might involve commitment. It usually doesn’t. The majority of bathroom exhaust fan covers are held in place by two spring-loaded wire clips that compress inward – you pull the cover down until it hangs loose, squeeze the clips together through the slots in the cover, and it comes free. Some older models use a single screw at the center, which a basic screwdriver handles in seconds.
Once the cover is off, take it to the sink. Wash it in warm soapy water, use an old toothbrush to get into the grille slats if needed, rinse it, and set it aside to dry completely. You’ll be surprised what a difference a clean cover makes before you’ve touched anything else.
While it’s soaking, take a look at the cover itself. Visible mold spotting, warped or cracked plastic, or a cover that’s discolored beyond what cleaning can fix are all signs worth noting – we’ll come back to what they might mean at the end of the article.
The Fan Blade and Motor Housing
With the cover removed, you’re looking at the interior of the unit – either a fan blade (a flat, propeller-style blade) or a blower wheel (a cylindrical drum with fins), depending on the model. Both can be vacuumed carefully with a brush attachment. Work slowly and don’t apply pressure – you’re removing loose debris, not scrubbing.
Follow up with a can of compressed air to dislodge anything the vacuum didn’t catch, directing the nozzle into the housing from the outside rather than pointing it directly at the motor. A dry microfiber cloth can wipe down the interior walls of the housing.
The critical rule here: the motor itself should never be wet-cleaned. No damp cloths, no sprays, nothing liquid near the motor or its wiring. Dry cleaning only in the housing interior. If you can see visible mold growth on or near the motor, or wiring that looks damaged, that’s where this job stops and a licensed electrician’s begins.
The Vent Duct Opening
At the back of the housing, there’s a duct opening – the passage that carries humid air out of the bathroom and, ideally, out of the house entirely. This is the most overlooked part of the cleaning process, and for good reason: it’s not immediately visible and it’s easy to assume it’s fine.
Shine a flashlight into the duct opening and check for visible blockages – compacted debris, a damper flap that’s stuck closed, or evidence of a bird or pest intrusion if the exterior vent isn’t properly screened. A partial blockage here can cut airflow dramatically even if the fan itself is spotless.
Once the cover is back on and the fan is running, hold a single sheet of tissue paper up near the grille. A properly functioning fan should pull it firmly against the cover. If it flutters weakly or drops away, the fan is not exhausting air effectively – and if you’ve just cleaned everything accessible, the problem is likely in the duct itself. A fully blocked or disconnected duct is an HVAC technician’s territory, not a cleaning task.
Keeping It Cleaner Between Deep Cleans
A Two-Minute Habit That Makes a Real Difference
The single most effective habit for reducing exhaust fan buildup is also the most consistently ignored piece of advice in bathroom ventilation: run the fan for 15 to 20 minutes after you finish showering, not just during. Most of the moisture in a bathroom is still in the air when you turn the shower off – running the fan only while the water is on addresses maybe half the problem.
A quick pass over the cover grille with a vacuum brush attachment during your regular bathroom clean – once a month takes under two minutes – prevents the compacted buildup that makes a deep clean necessary every few months.
In Chula Vista, mild year-round temperatures mean cracking a bathroom window for 10 minutes after showering is a realistic option in most months – something that isn’t always practical in colder climates. Using both the fan and a cracked window together cuts the moisture load significantly and gives your fan a meaningful break.
When the Fan Itself Is the Problem
Signs It’s Time to Replace, Not Just Clean
Cleaning has its limits, and a well-maintained exhaust fan still has a finite lifespan – typically 10 years for a quality unit, less for cheaper builder-grade models.
If your fan is loud after cleaning, the motor bearings are likely worn. If it runs but the tissue test still fails, the motor may no longer be generating adequate suction. Visible rust inside the housing, persistent mold that returns within weeks of cleaning, or a unit that simply looks like it predates the current decade are all reasonable signals that replacement is the more sensible investment.
A new exhaust fan rated appropriately for your bathroom’s square footage – measured in CFM, or cubic feet per minute – is one of the most cost-effective upgrades a homeowner can make for long-term bathroom health. Knowing when cleaning is the right tool and when it isn’t is, in the end, what separates maintenance from wishful thinking.